Timekeeper Absence Management Process Guide
Overview
This step-by-step guide will show you how to enter absences on behalf of other employees in PeopleSoft (MyFresnoState). The employees you see are based on the department security you have. Absences should be entered as they occur. There is no need to wait until the end of the pay period to key them in. All absences must be entered and approved by the close of business on the first day of the next pay period.
Table of Contents
- Log In/Report and View Absences — 2
- Report Absences for Employees — 4
- Delete an Employee Absences — 8
- Absences Requiring Comments — 9
- Reporting No Leave Taken — 10
- Understanding Error Messages — 11
LOG IN AND NAVIGATE TO REPORT AND VIEW ABSENCES
To enter your absences, you must first log in to your MyFresnoState portal.
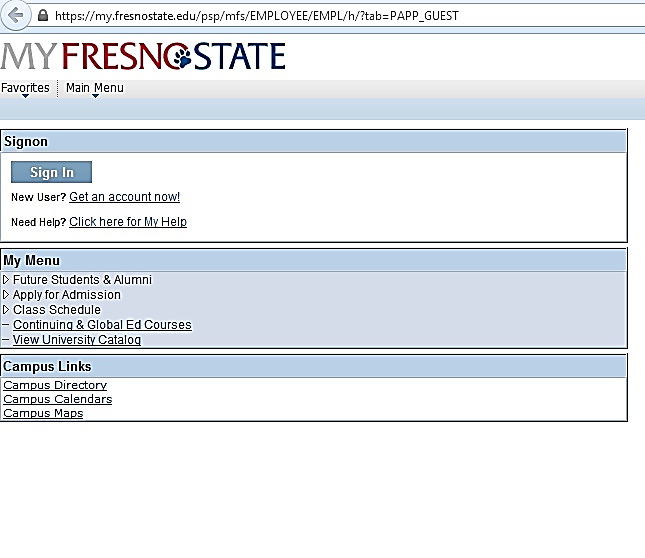
The MyFresnoState homepage displays.
- Go to MyFresnoState (http://my.fresnostate.edu/).
- Click the MyFresnoState “Sign In” button.
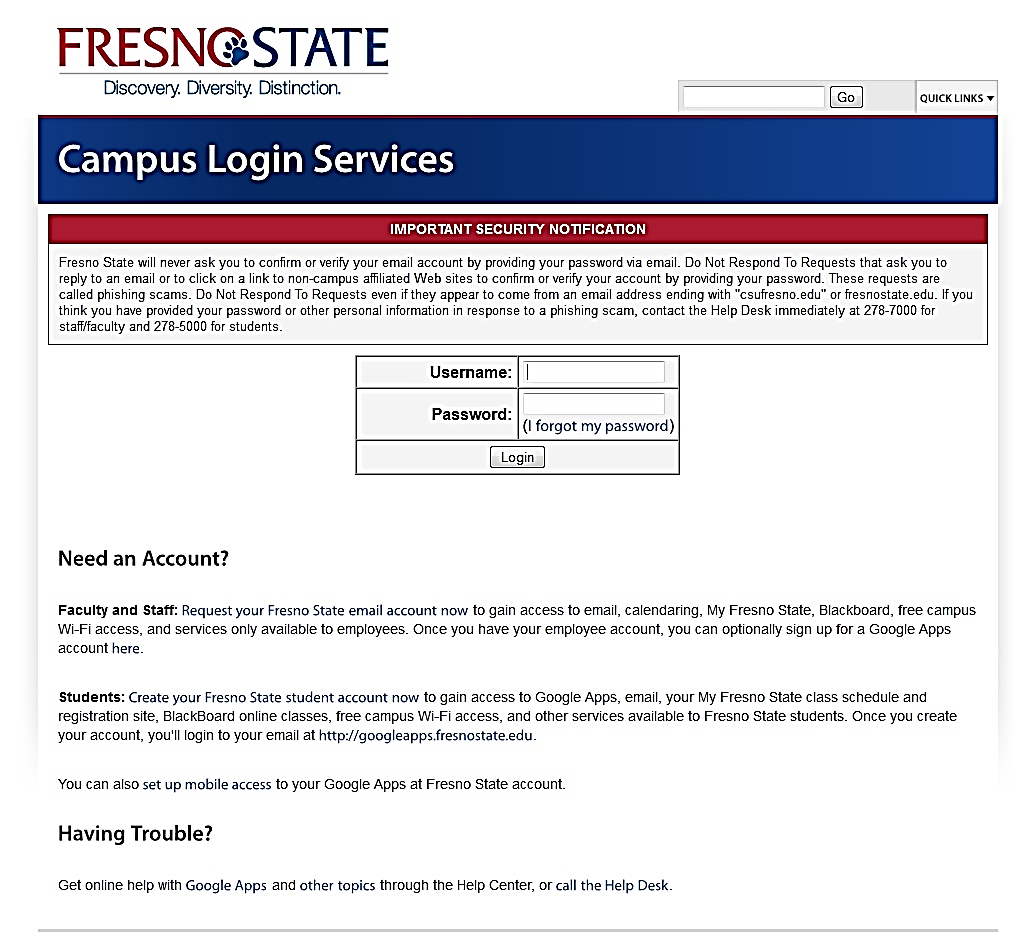
The Oracle PeopleSoft Enterprise Sign In page displays.
- Enter your Fresno State ID and Password.
- Click the “Sign In” button.
Note: If you have difficulty logging in, contact the Help Desk at 278-5000
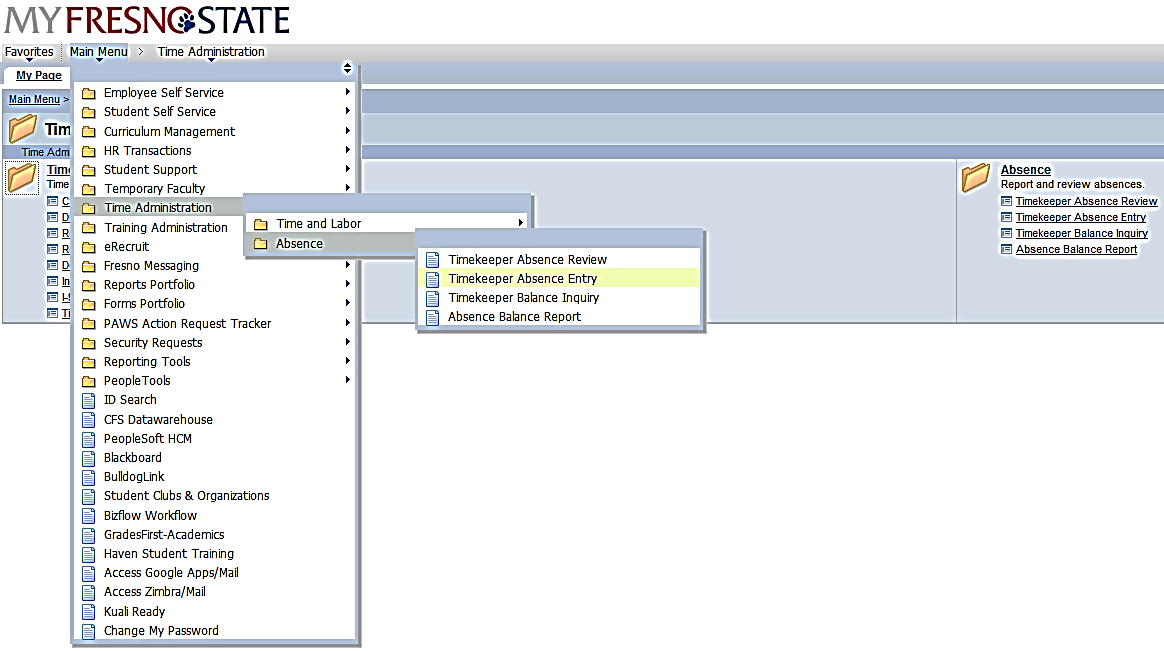
Report and View Absences for Employees
- From the Main Menu navigate to Main Menu > Time Administration > Absence > Timekeeper Absence Entry.
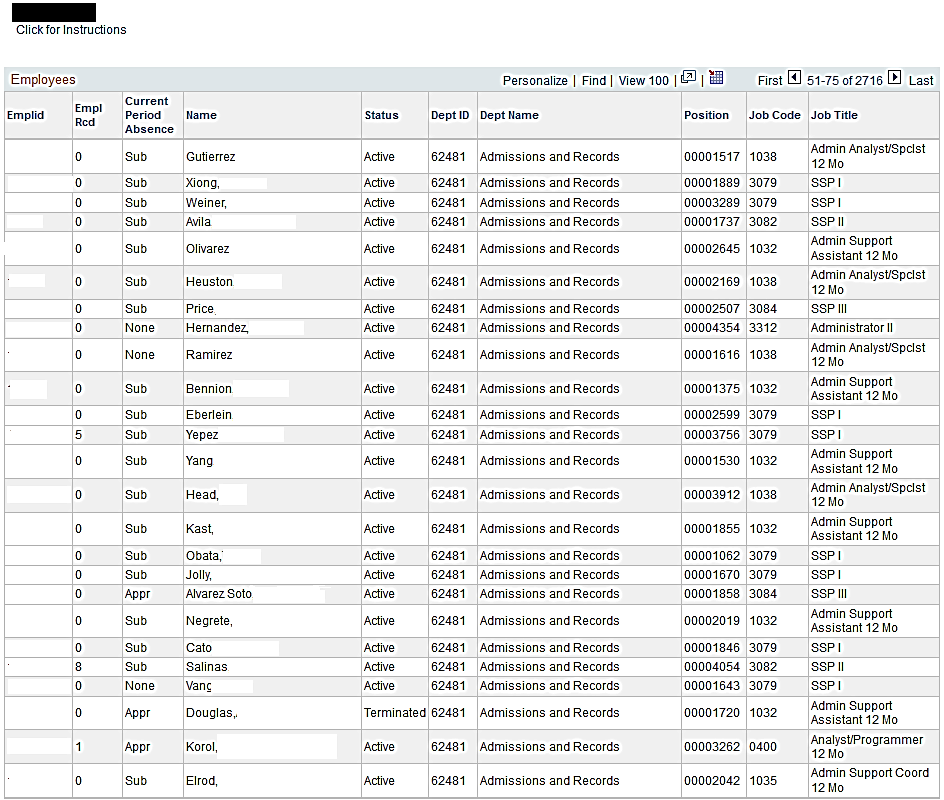
The Timekeeper Absence Entry Page displays.
After selecting the absence Entry page link, PeopleSoft will load the list of employees from your department and display them in a grid.
- To enter an absence, select the employee by clicking on their Emplid.
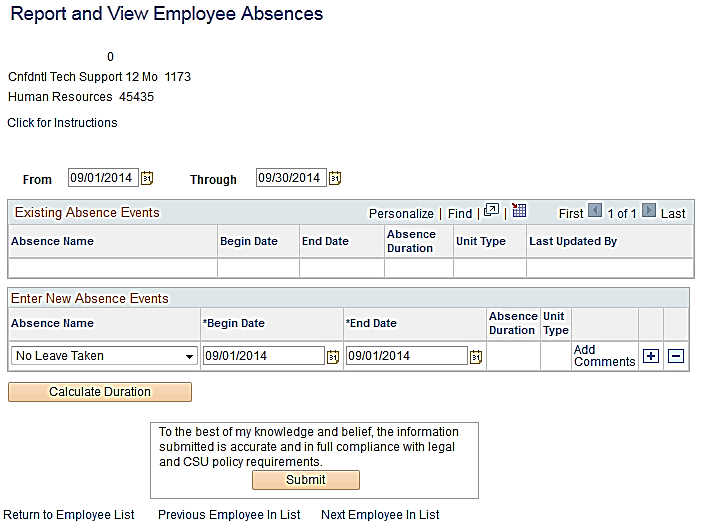
The Report and View Employee Absences page displays.
Note: If an employee holds more than one position, you will be prompted to select which job you want to enter absences for.
Existing absences for the current pay period will be displayed in the top grid. The From and Through dates can be changed to sow absences from other pay periods.
In the bottom grid, the Absence Name “No Time Taken” defaults to the current period Begin Date and End Date
- If this is correct, click the Submit button.
No other action is necessary.
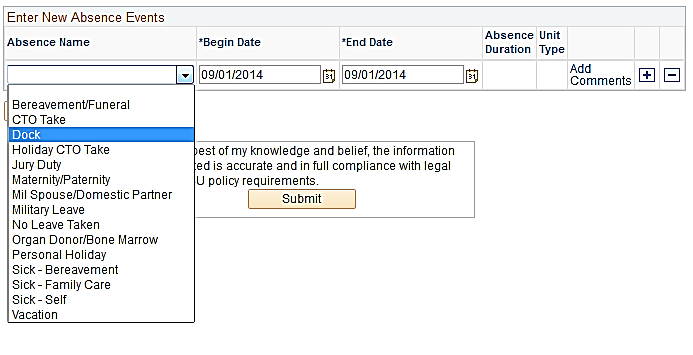
A list of eligible absence types will display.
The values displayed in the dropdown are based on the type of employee selected and also their bargaining unit.
- Highlight the absence type you wish to enter and release your mouse.
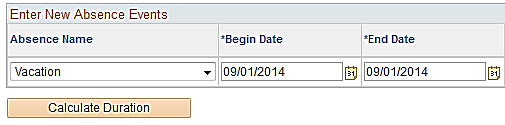
The absence type is then populated in the Absence Name field; the balance associated with the absence displays.
Note: Some absence types do not have balances (e.g. Jury Duty, Furlough, etc.)
- Enter the Begin and End Dates of the absence; you may click the calendar icon to select the dates from a calendar.
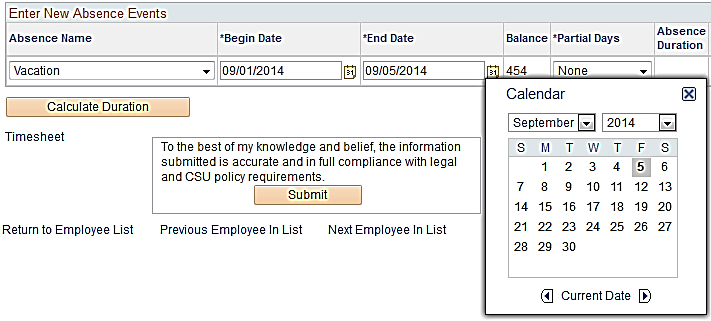
A completed absence entry might look something like this.
Pushing the Calculate Duration button will make the Absence Duration appear. This is not required and will happen automatically upon pushing the Submit button.
Push the plus button to enter additional absences.

Enter Partial Hours
Partial Hours should be used when you are entering leave that is less than 1 day of the employee’s normal schedule. Partial Hours should always be used for hourly employees and for employees on alternate schedules on weeks when the schedule changes. (e.g. furlough weeks.)
- Click the Drop Down arrow in the Partial Days column and select Partial Hours.

The Hours per Day box will appear.

- Enter the appropriate number of hours in the Hours per Day field for that absence entry.
Continue entering absences as appropriate.
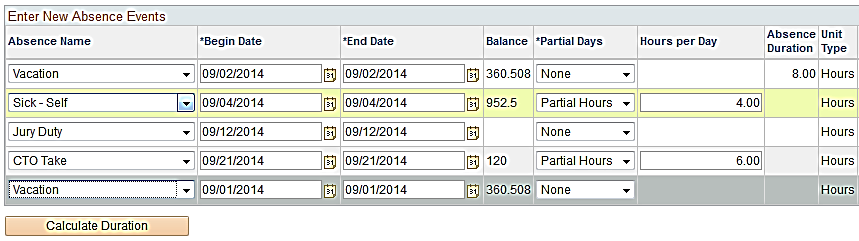
You may enter more than one absence type on a day.
In some situations it may be necessary to enter more than one absence type on a day. This is allowed as long as you don’t go over the total number of hours on the employee’s schedule for that day.
In this example, the employee works an 8 hour day and has combined 2 types of absences to make up her 8 hours.

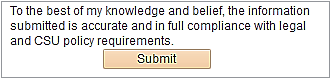
Once all absences are keyed, push the Submit button.
Pushing the Submit button prepares the absences for approval by the manager/supervisor. By pushing this button you are affirming that the information you have entered is accurate and in compliance with policies.
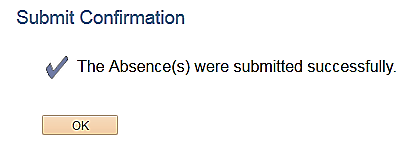
Your submission is confirmed.
If all absences have been keyed correctly, you will receive a confirmation.
- Click OK to return to the prior page.
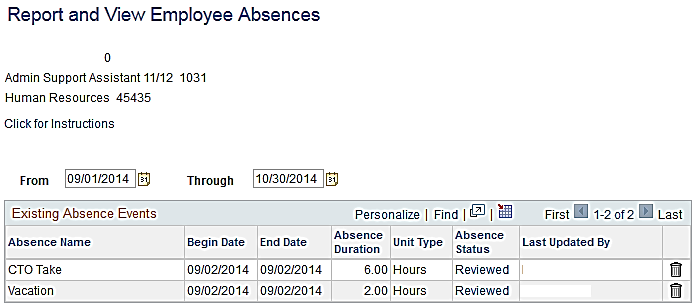
The View or Report Employee Absences page displays.
All absences submitted by you, the timekeeper, show as Reviewed and are ready to be approved.
Delete an Employee Absence
Navigate to the View or Report Employee Absences page.
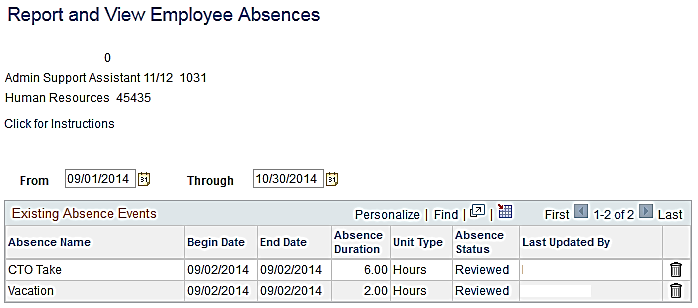
All absences submitted and/or approved appear in the top portion of the page. You may delete any absence that was completed through timekeeper entry and is not processed or finalized.
- Click the trashcan icon in the far right column next to the absence you wish to delete.
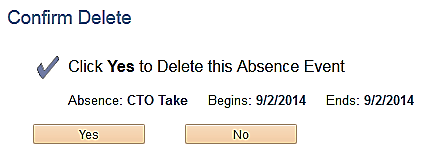
A delete confirmation appears.
- Click Yes if you really want to delete the absence, or click No if you do not.
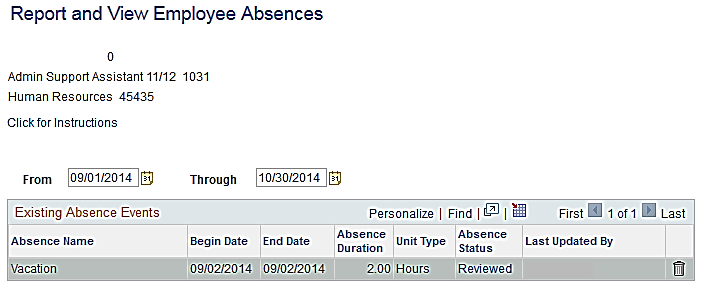
The View or Report Absences page displays.
The deleted absence no longer appears.
Absences Requiring Comments
Navigate to the View or Report Employee Absences page.
Some absence types may require you to enter a comment.
- Funeral
- Sick Leave-Family
- Sick Leave-Death
When an absence like this is selected, the Add Comments link will turn red.

- Click the Add Comments link to enter the required comments.
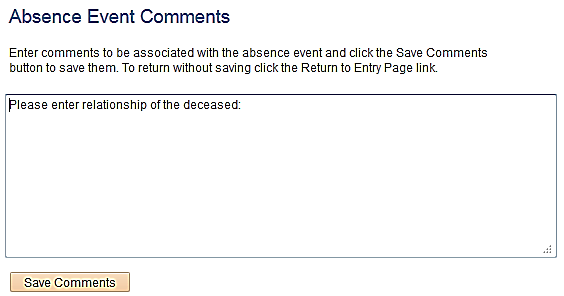
The Absence Event Comments page displays.
- Enter the appropriate comments.
- Click Save Comments when all information is entered.
Note: When entering a family relationship, it is not necessary to use specific names, just the actual relationship (e.g. grandmother, father, etc.)
The Report and View Absences page displays.
The Add Comments link changes to say Edit Comments. The Absence can now be submitted.

Reporting No Time Taken
All employees will be required to report No Time Taken if they have no absences to report for the pay period.
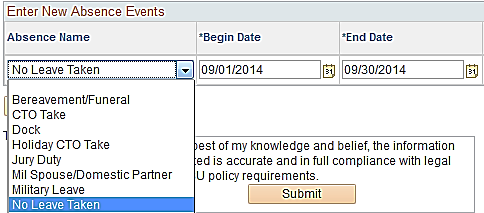
No Time Taken is an option in the absences dropdown that you can enter for your employees.
- Select No Time Taken just like any other absence.
- Enter the Begin and End Dates of the pay period and submit the absence.
Understanding Error Messages
Navigate to the View or Report Employee Absences page.
There are many reasons why a submitted absence will fail validation. The list below contains a few examples:
- Absence keyed on a non-work day.
- Too many hours keyed based on a schedule.
- No comments entered.
In the example on the right, a Funeral Leave has been entered but no comments have been added.

The Submit Confirmation page displays an error.
- Click OK to return to the prior page and view messages.
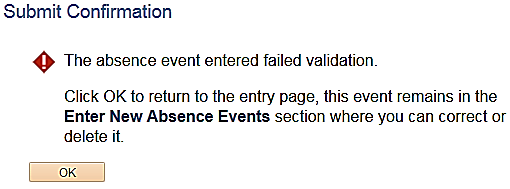
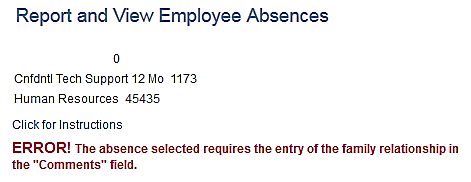
The messages are displayed in red at the top of the messages; there may be more than one.
Please read the error messages carefully and correct your entry as appropriate.
This HTML version was generated with AI assistance and may contain errors or omissions. The original approved PDF remains the official document of record. An alternative accessible format is available upon request from the document creator in accordance with Title II of the ADA.