Time Entry — Hourly Employees
Overview
This user’s guide provides hourly employees step-by-step instruction on how to use my.fresnostate.edu to enter time worked. You should enter time each day that you work. Your supervisor will monitor your time throughout the month and must be able to see the hours as you accumulate them. (Do not enter time on Fresno State holidays unless your supervisor has given you approval.)
Check with your supervisor for special instructions on time entry for your department. Also, some pay periods overlap a new month. View the appropriate Pay Period Calendar on the Calendars page (http://www.fresnostate.edu/adminserv/hr/payroll/news/calendars.html) for more information.
Table of Contents
- Logging In
- Minute Conversion Chart
- Entering Time
- Print Timesheet
- Enter Comments
- Enter Absence/Vacation
- View Previously Entered and Paid Time
Fresno State Human Resources
User Guide
Updated 10/01/2013
LOGGING IN
This section shows how to log into your MyFresnoState portal.
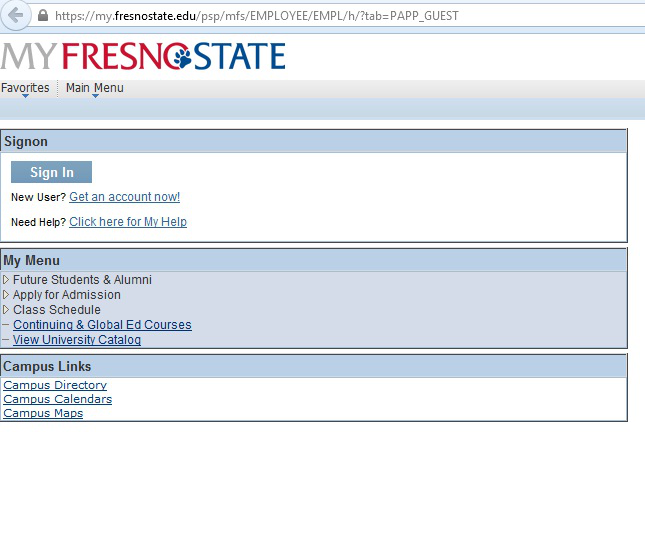
The MYFRESNOSTATE homepage displays.
- Go to MyFRESNOSTATE (http://my.fresnostate.edu/).
- Click the MyFRESNO STATE SIGN IN button.
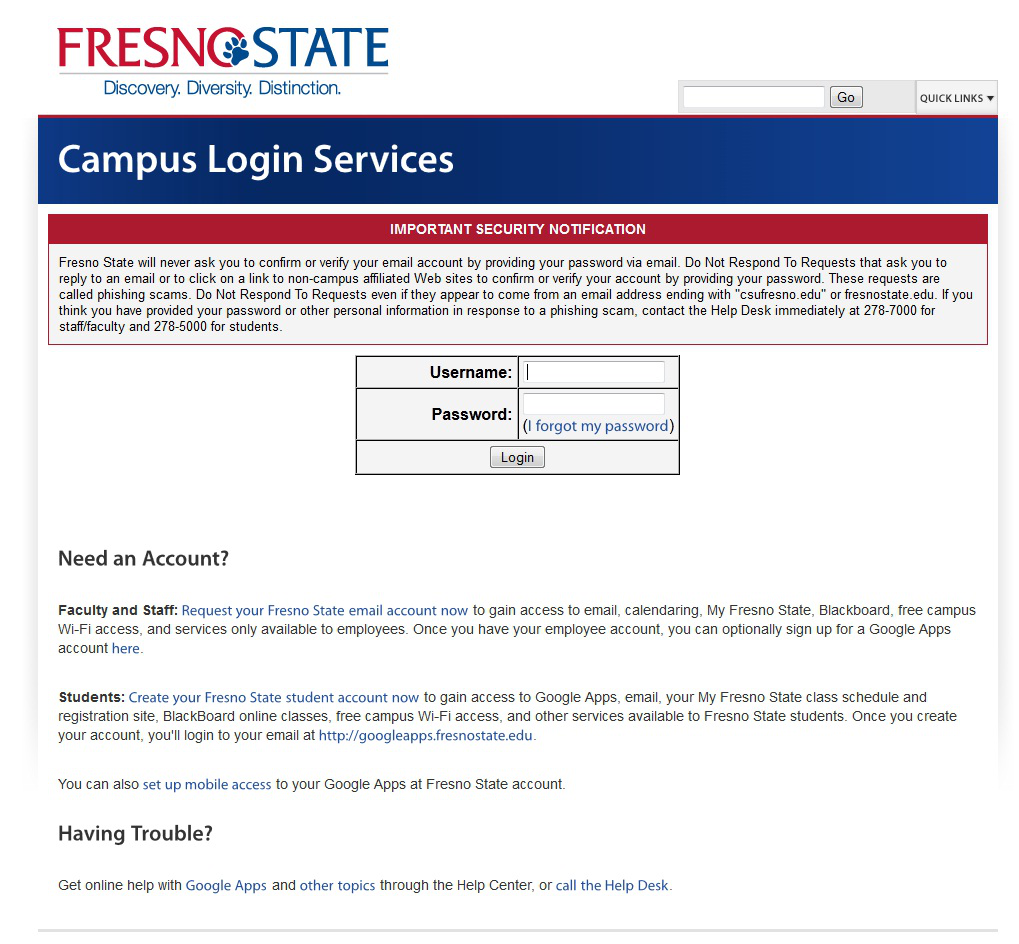
The Oracle PeopleSoft Enterprise Sign In page displays.
- Enter your Fresno State ID and Password.
- Click the “Sign In” button.
Note: If you have difficulty logging in, contact the Help Desk at 278-5000
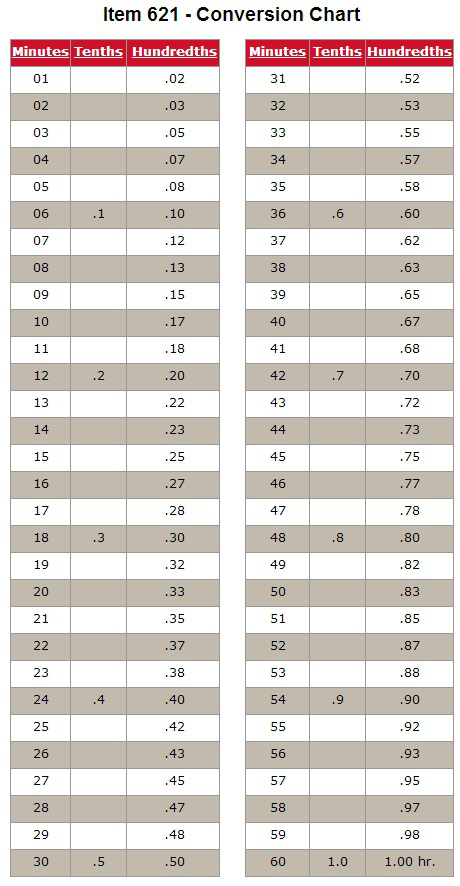
MINUTE CONVERSION CHART
Please use the following chart to properly enter fractions of an hour worked.
Fractions of hours reported for regular time worked are always reported in hundredths.
Example: 1 hour 22 minutes would be reported on your timesheet as: 1.37 hours.
ENTERING TIME
This section shows how to enter time worked.
The Main Menu displays.
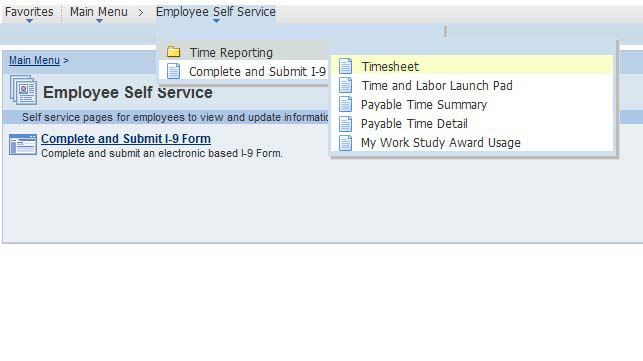
- From the Main Menu, click “Employee Self Service”.
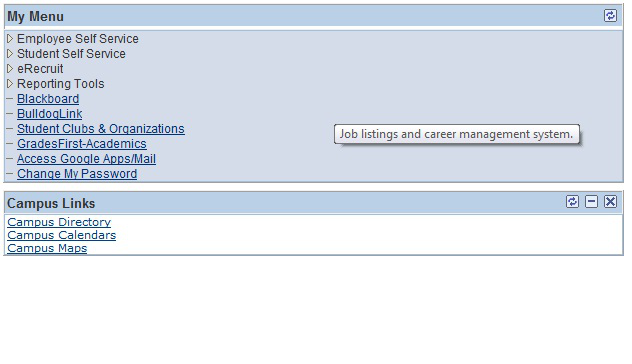
The Employee Self Service page displays.
- Continue navigating: Time Reporting > Timesheet.
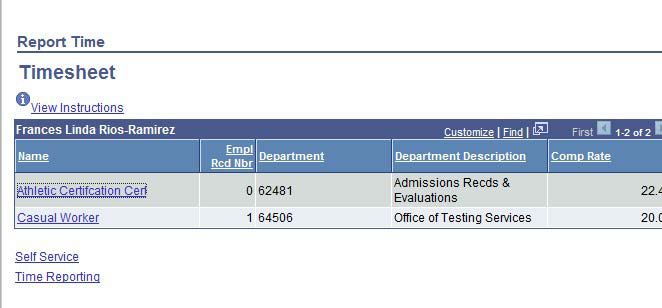
If you have only one job, you will be taken immediately to the timesheet.
If you have multiple jobs, they will all display.
NOTE: Verify the following to ensure you have selected the correct job:
- Department Name
- Job Title
- Empl Rcd Nbr
Timesheet will display:
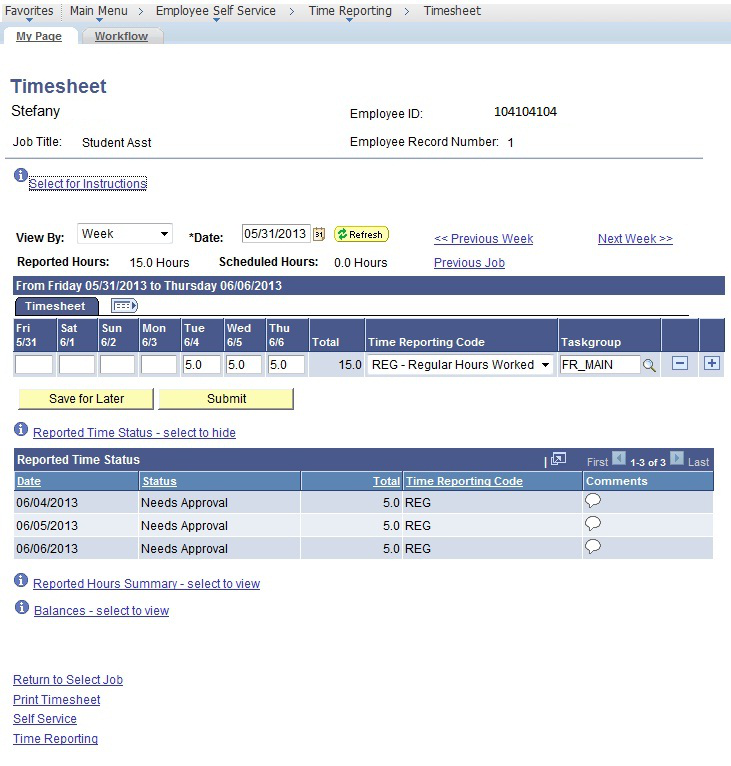
- Select time period using the “View By” dropdown menu. View shown is “week".
- Enter hours worked each day (Adjacent view shows a partial month’s calendar).
- After time is entered, Click “Submit”.
- Once you click “Submit” you will see your hours under Reported Time Status awaiting approval by your supervisor.
NOTE: This example shows Status as “Needs Approval”. Once the Department Timekeeper has approved Your time, it will show as “Approved”.
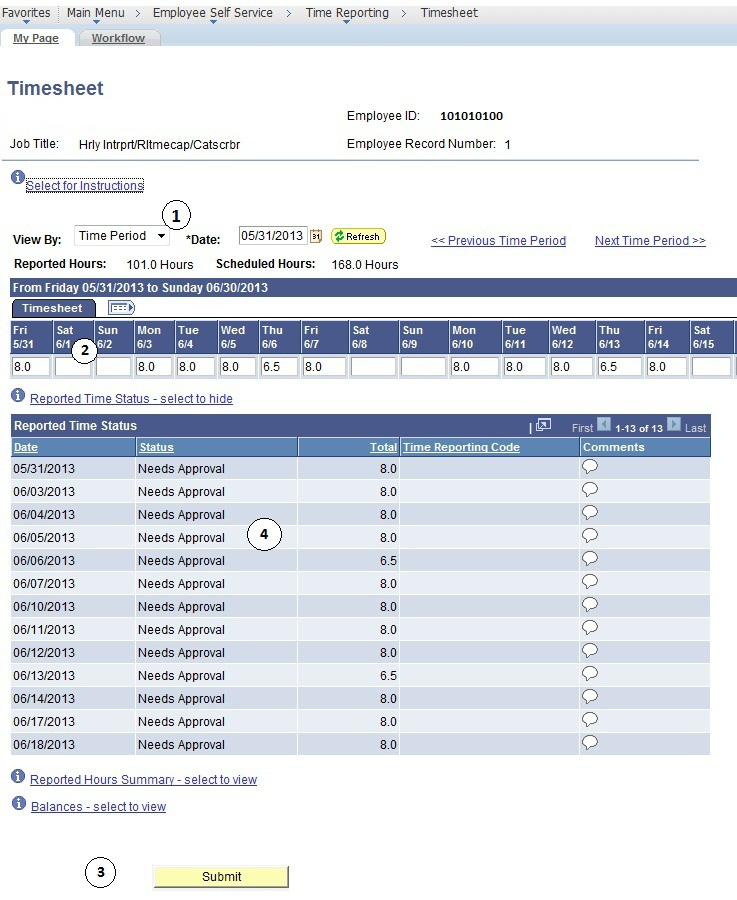
This example shows the latter half of the month.
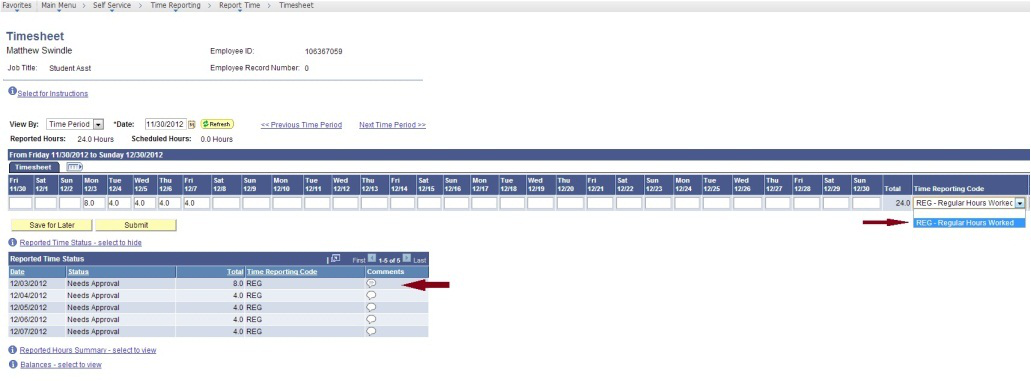
- Please be sure that task group is always: “REG- Regular Hours Worked”
- Task Group should be “FR_MAIN”

The task group will always default, do not change the default value.
NOTE: If you have not filled out the online Form I-9, and completed new hire paperwork with human resources, you will not be able to enter any time worked.
Enter time each day you work.
Do not wait until the end of the month.
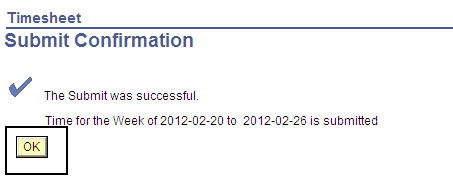
The Submit Confirmation page displays.
- Click OK.
PRINT TIMESHEET
All hourly employees have the ability to print a timesheet.
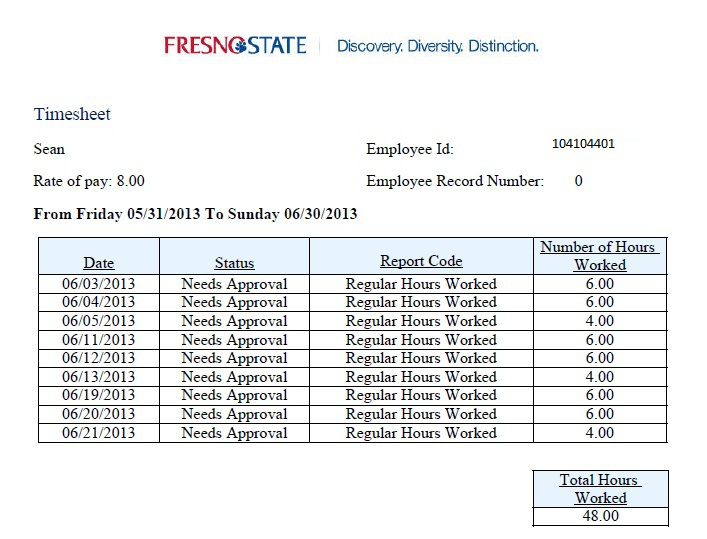
Timesheet may be printed by clicking the “Print Timesheet” link.
Adjacent is the view of a printed timesheet.
COMMENTS
There are occasions when you must enter a comment in addition to your daily hours. Examples: Making changes to already approved time, any reason for change to normal work hours (late, making up time, covering hours for someone).
Comments may be added by Clicking on the comments “bubble”.
- Click on “bubble”.
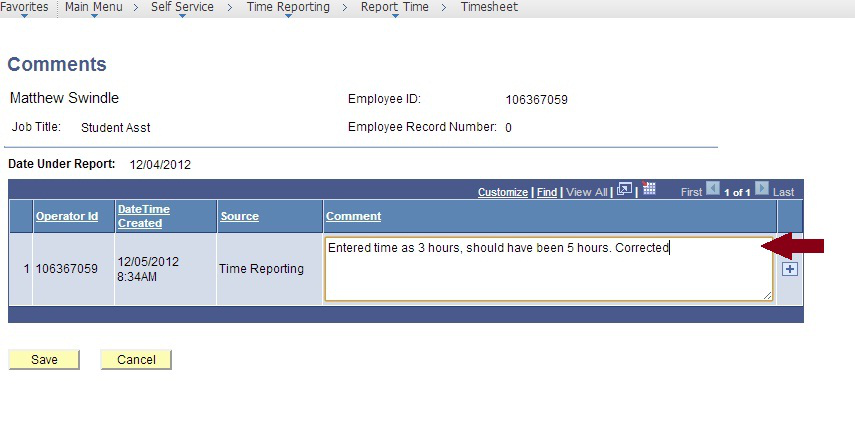

- Enter comments in the Comment section.
- Click “Save”.
- Your comments will be added, and you will see lines in the comments bubble.
ABSENSE ELIGBLE EMPLOYEES-ENTERING ABSENSES/VACATION
This section demonstrates for ABSENSE ELIGBLE EMPLOYEES how to use Absence Management to enter absences (vacation, sick time, etc.).
The Main Menu displays.
- From the Main Menu, click Employee Self Service.
- Continue navigating: Report Time > Report and View Absences
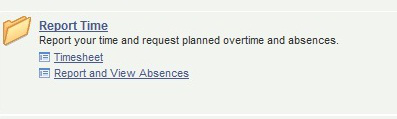
NOTE: Your department supervisor can assist you with any questions pertaining to entering absences into the Absence Management system.
VIEW PREVIOUSLY ENTERED and PAID TIME
This section demonstrates how to use the Time and Labor Launch pad to view time entered by month.
The Main Menu displays.
- From the Main Menu, click Employee Self Service.
- Continue navigating: Time Reporting > View Time > Time and Labor Launch Pad
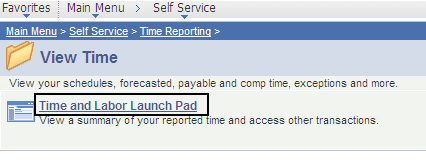
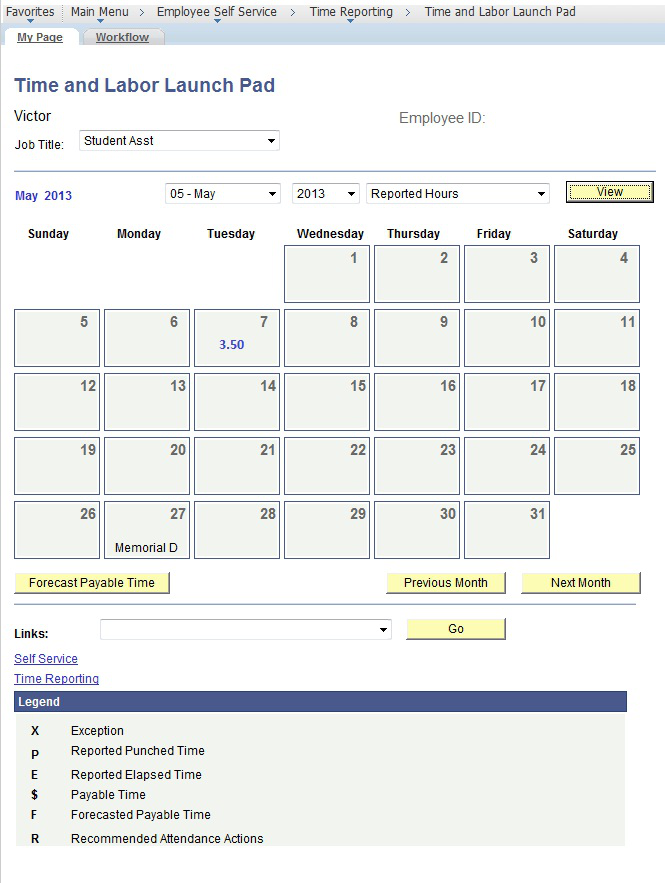
The Time and Labor Launch Pad displays, showing the current month.
Note: If you have multiple active jobs, a Job Title: dropdown menu will display.
- To change the time period, use the dropdown menus, and then click the View button.
- Reported Hours: time submitted
- Payable Hours: time that has been approved
- Click linked dates for more information about the time (see following).
Note: The legend at the bottom explains the values that appear in the calendar.
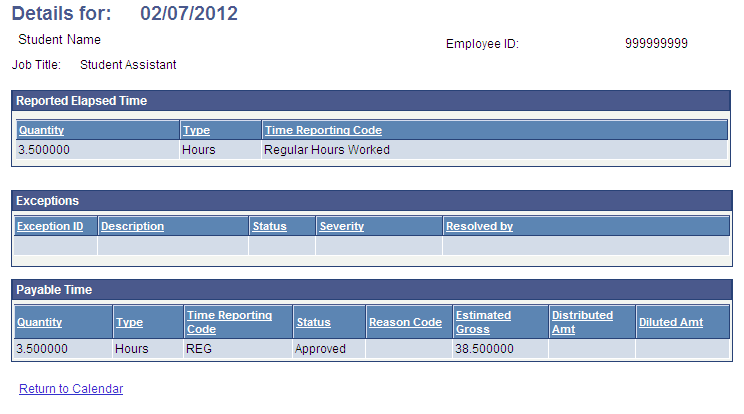
A Date Details box (from above screenshot) displays.
- Click the linked date.

Details about reported time displays.
- If Status is blank, then the time is not approvable by your supervisor.
- If Status is Needs Approval, your supervisor needs to approve time.
- If Status is Approved, your supervisor approved the time.
- If Status is Transmitted – Sent to PIP, information has been sent to the State Controller’s Office for processing
This HTML version was generated with AI assistance and may contain errors or omissions. The original approved PDF remains the official document of record. An alternative accessible format is available upon request from the document creator in accordance with Title II of the ADA.